If you are a supplier of basic telecom service and you just need a softphone dialer for your subscribers to make outgoing calls to their contacts or answer phone calls – you can just grab the standard version of WebTrit; then use our Branding Editor to adjust your company logo and colors and you’re good to go.
But what if you need more than that?
- What if you want to customize the in-app sign-up process based on the country where customers are located, so it will collect the information required for that particular country?
- Or do you want to dynamically display offers tailored to that particular customer and allow them to activate the promotion without leaving the app?
- What if you want to allow users to make configuration of their PBX settings from within the application?
This is where WebTrit truly shines compared to the standard “closed source” dialer applications available in the market.
Custom Softphone App Branding
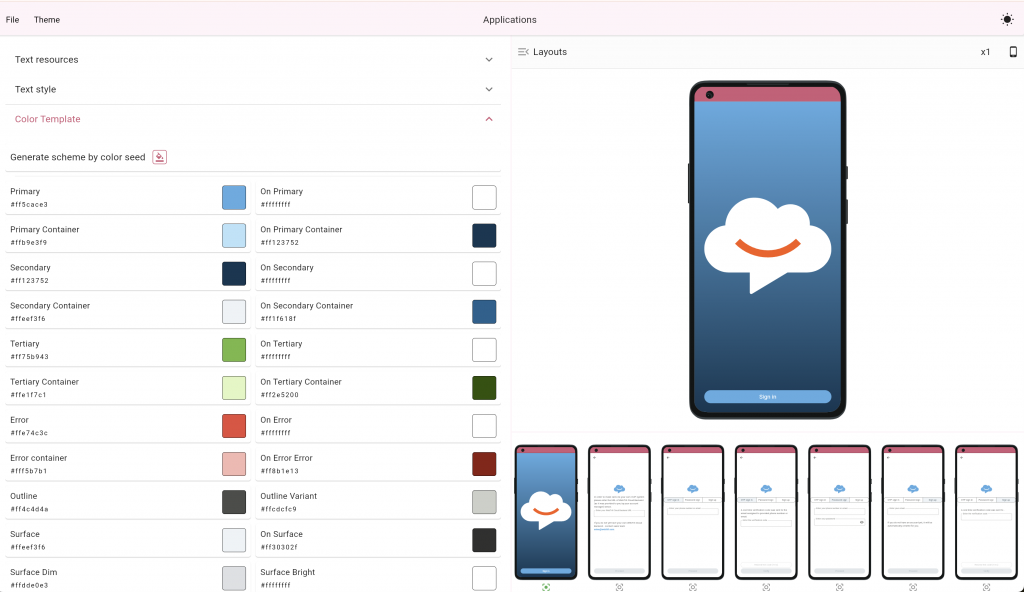
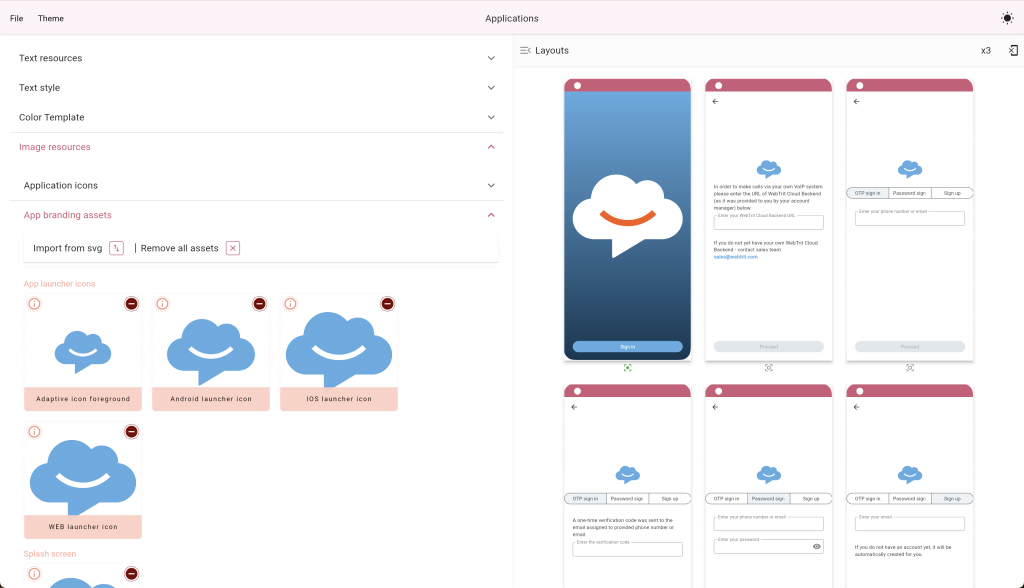
Of course you can customize the layout of your WebTrit application by applying different colors, fonts, your company logo, and other elements of style using a visual editor we provide (here is a YouTube video that covers it). This does not require any changes in the app code – and once your application branding theme is created, it will be automatically applied to all future version updates with no need to do any manual work.
Changes to the functionality and UX
But the focus of this article is on the advanced changes: not about how the application looks – but something related to the functionality? There are three separate areas for customization of the WebTrit app:
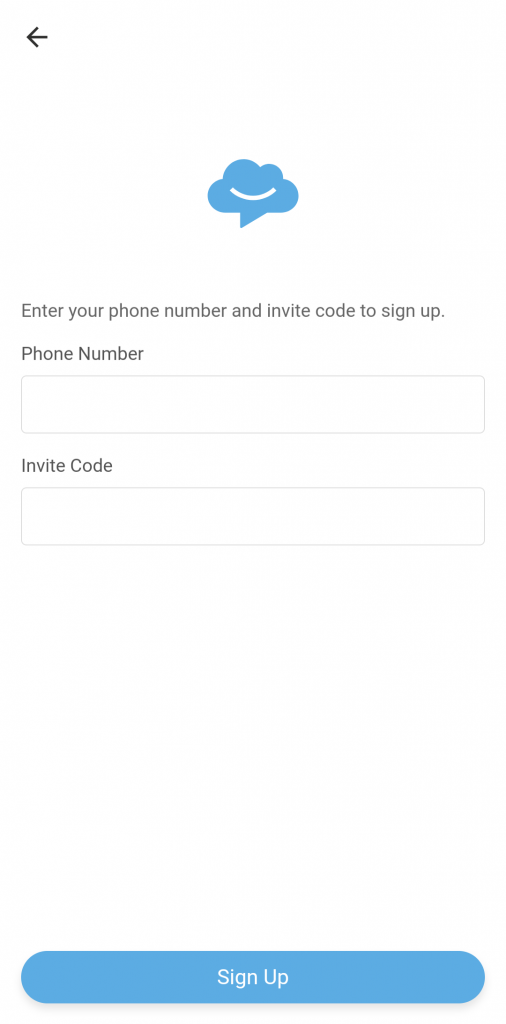
- Custom-tailored sign-up process, so new customers can activate the service after opening the app for the first time
- Ability to dynamically display “call to action” buttons on certain screens of the application (for example you want to show promotional offers to users and allow them to make purchases from within the application)
- Finally, the ability to view information or perform actions on external systems – but without leaving the app! This can be used to manage users’ PBX settings, such as adding a new phone number for call forwarding and many other things.
Customized app – the two approaches: changing the Flutter code vs. embedded webview
With the mobile-first approach it is expected that new users will download the app, do the initial registration inside the app (providing their contact details, credit card number, and other necessary information), and start using the application after that – without ever having to go to your website or other portals. But how to implement it in a way that balances good user experience and flexibility (for instance you want to add the ability to use a promo code on the sign-up page) with the amount of required engineering efforts?
Advantages of using Flutter for customization
The most straightforward thing to do is to simply go to Github, fork your own branch of WebTrit phone app and go into the Dart / Flutter code to make the changes. There are obvious benefits of going this route:
- High Performance: Pages implemented directly in Flutter integrate more seamlessly, delivering faster response times and a native feel.
- Flexibility: You can program anything you want in these pages – whether it is accessing the finger-print reader on the phone to satisfy KYC (know your customer) requirements or confirming the transaction via blockchain.
But of course there are significant drawbacks
- High Development Effort: Building your app widgets or pages in Flutter requires considerable coding, making it time-consuming to implement new features or update existing ones.
- Rigid Update Process: Any changes to the functionality (e.g. a new field to be added) or even in UI layout require changes to the code and redeployment of the app to app stores, which can be cumbersome and time-sensitive.
- Limited Flexibility for Dynamic Content: Embedded features that need regular updates (e.g., promotional banners, location-based offers) or that content is different per region or customer would be difficult to manage with Flutter, since you will end up with one chunk of code handling all different scenarios.
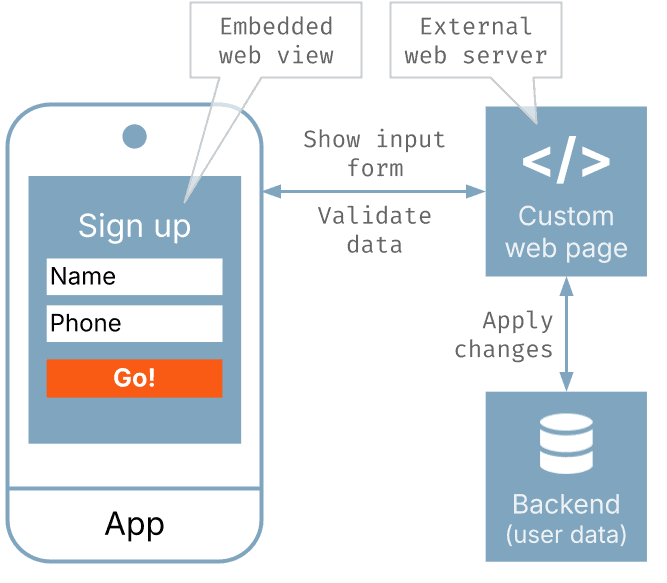
So WebTrit is strongly suggesting a different approach, which fits over 90% of all use cases for the app customization. When the application is built and published to the app market, it does not contain any of that custom code – when a custom screen has to be displayed, the app opens a web page in the “embedded web view” – basically the web browser, which is a part of mobile OS.
For instance when the “custom sign up” option is enabled – the application is simply configured with a URL of an external web page, which will perform the data collection and validation. So when the user clicks the “Sign up” button in the app, this page shows the list of inputs (name, phone number, credit card number, etc.) where the user can enter the data – but to the user, it seems like an integral part of the application, they don’t notice what it actually loads a different web page.
As with any solution, there are some advantages and disadvantages of this.
Pros of using custom web pages
- Wide choice of ways to implement the custom logic: Since it is an external web site, maintained by your team – you can use whichever technology, programming language or framework you want. So if you have a spare development capacity of a programmer, familiar with Angular – use it. Or you want to create a prototype of such page using a no-code platform such as Bubble – no problem!
- Easy Updates and Flexibility: With embedded web views, you can update the code y on the server side at any time, making changes visible to users instantly without updating the app itself. Or you may even do things such as A/B testing, running several versions of the custom code in parallel.
- Lower Development Overhead: To create a web page that collects some basic customer info, validates it and stores it in the database is easy – almost anyone with AI coding assistant can create it in a few hours. And since it runs isolated from the app, there is no risk of messing something up in the other parts of the app!
- Versatile Integrations: Using embedded web pages allows for quick integrations with third-party systems (for instance when a new customer is created in your Cloud PBX system, their email is automatically added to your CRM to enroll them in the marketing campaign).
But we have to be honest and mention some cons
- Potential UI Inconsistencies: Embedding web content, if your web developers are not careful with the design elements, CSS, etc. may create a slight UI disparity between the native parts of the app and the web view, which could affect user experience.
- Dependency on Internet Connection: Web-based content requires an internet connection, so these pages will not open in offline scenarios or may be slow to open when the connectivity is poor.
So we feel that the ability to rapidly deploy new in-app functionality via the custom pages and test your idea with real customers overcomes the potential drawbacks. Plus the choice of “Flutter vs. external web page” is not final: if the new addition to the app is successful, you can always implement it using a native Flutter code later!
Customer sign-up tailored to your needs
As we just discussed implementing the front-end interface for sign-up inside of the WebTrit application using Dart/Flutter (although technically possible!) would be very cumbersome and will require significant engineering efforts.
But for things such as signup process there is even a more important consideration: when you roll out changes to the process, for instance a new input field for a promo code or data validation logic (e.g. disallow the registration with “disposable” email addresses) – you probably want it to apply for all new customers, trying to sign up. So when the customer, who installed the application a few weeks ago, but did not finish the sign-up then, finally decides to proceed with the sign-up – they will not see the field to enter the promo code can use the code mentioned in the marketing email they just received.
So we are definitely going with the custom web page approach. That page will be developed by your team, so it is very easy to change the logic there and implement additional functionality, such as applying the discount when a correct promo code is entered.
What are the requirements for this page? Here is a very basic example, basically it should
- Upon the initial request – generate an HTML that contains the set of initial input fields and the action button (“Sign up”, “Next”, etc.)
- When the button is pressed, do the data validation and then go to the next step. It is totally okay to have a multi-step signup process, for example, a customer enters personal data on the first screen, pics the product bundle on the second screen, provides the credit card information on the third screen and then reviews the info, clicks “I agree to the terms and conditions” and clicks “Activate” on the final screen.
- Make changes in your back-end databases such as cloud PBX, CRM, telecom BSS, etc.
- Finally the JavaScript code on the page initiates the closing of the embedded web view window and passes the final result of the sign-up to the WebTrit app. This typically includes some sort of session authorization token for the new user, so the user does not have to re-login and can proceed to use the app immediately.
Completion of the sign up process and API adapter
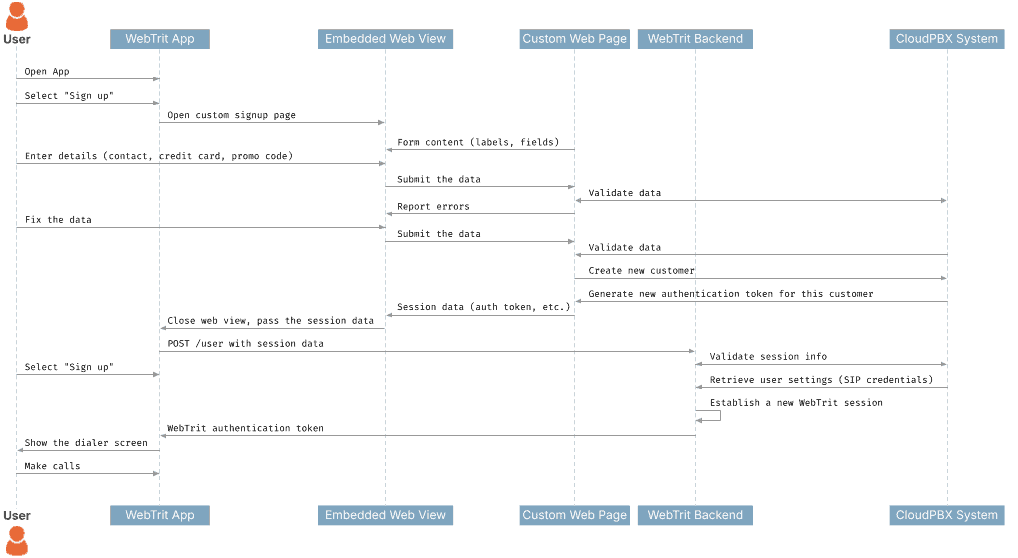
When the webview is closed, the app submits all the data, such session authorization token received from it, to the WebTrit back-end to double-check the information – this way if something went wrong and the signup page did not actually activate the user, they will not be able to use the service.
This is done using HTTP POST request to /user end-point of WebTrit core API – the same API method that is used for “standard” in-app sign-up. So in your custom API adapter (read this article for more information about API Adapters in WebTrit) you have to process this request correctly, validate the information with your user management system and return back to the WebTrit back-end API access token to be used for further requests.
Once the session is fully validated, the WebTrit back-end (via API adapter) obtains the required user settings (e.g. their phone number, SIP credentials, etc.) and connects to your Cloud PBX system to be able to receive incoming calls.
Here is the sequence flow
Call to action buttons
Imagine you want to offer to customers, who made more than 30 minutes of international calls last month, to sign up for a subscription that gives them 3 hours of free international calls. The old-school way of doing this would be sending them an email, which describes the promotional terms and requests to make the activation on your website.
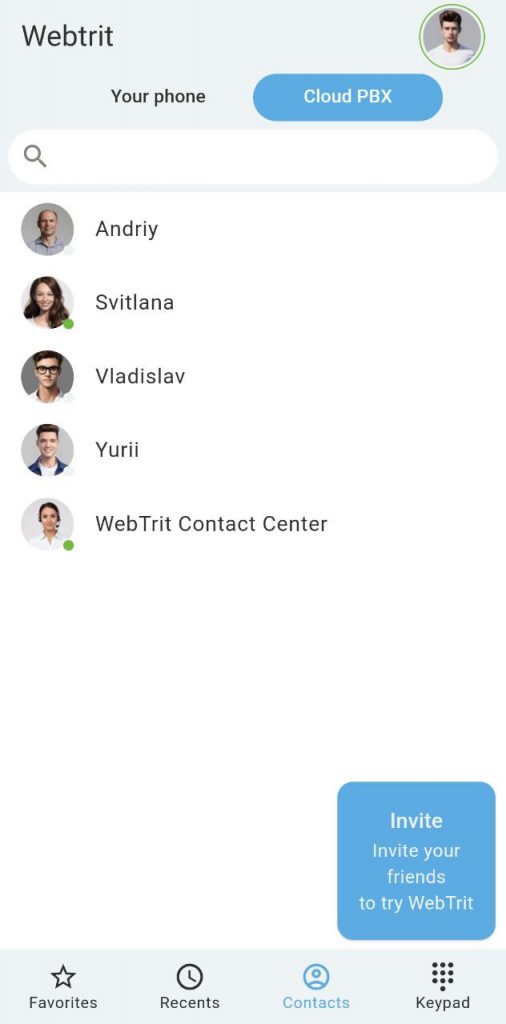
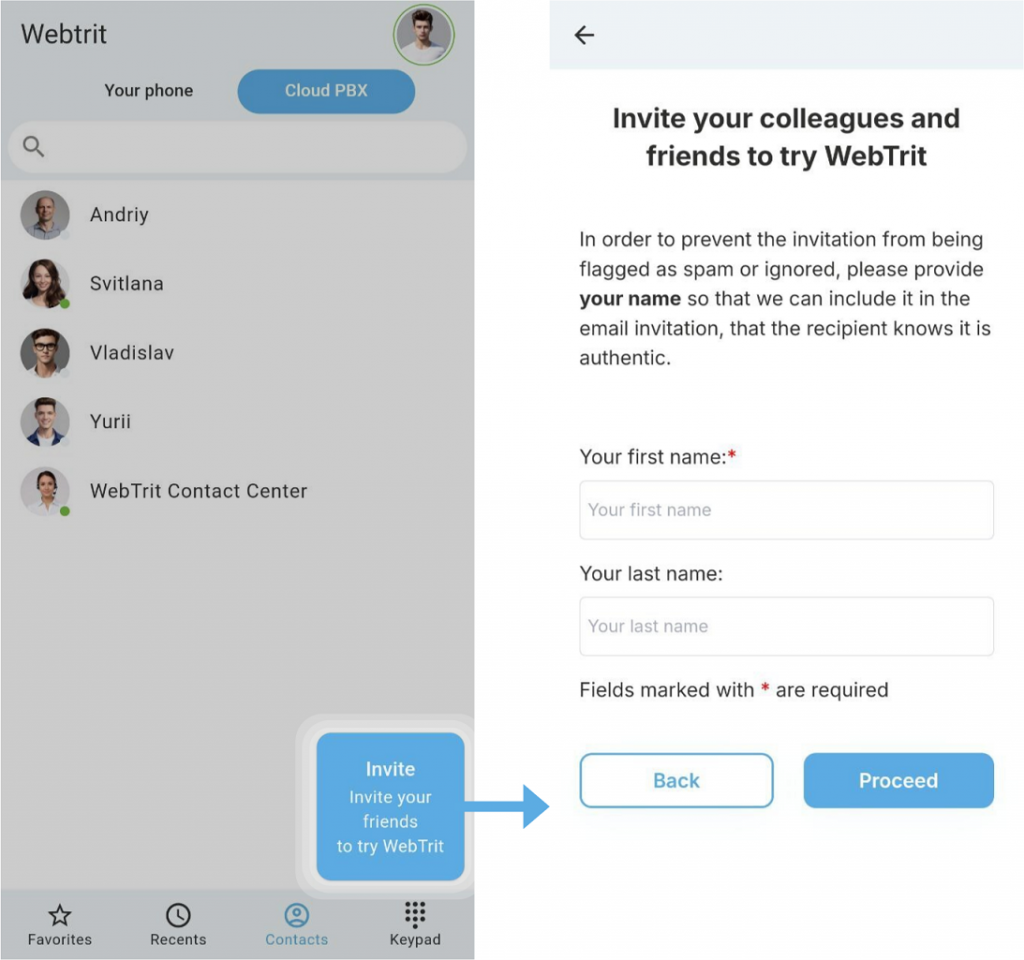
There’s nothing wrong with this, but what if we can show this special promo button right in the app? We can make it tailored to the needs of a particular user – so based on the user activity it can be an offer to activate an international calling bundle or to invite 5 friends and when they sign up to receive a credit.
How does it work?
When a user opens a specific page of the app, for instance the list of contacts or dial pad, in the background app sends a request to WebTrit backend using the custom API method called call to action. “Custom method” means something that is not a part of the standard API definition for communication between WebTrit back-end and API adapter – but rather something that can be dynamically added to fit the needs of your application or service. This request is then forwarded to the API adapter, which is under your control – so you can modify the logic of it to return:
- “Action name” – this is basically the title for the button to be displayed on the screen
- the URL of the external web page that should be opened when the user clicks on it.
Just as with custom sign-up, this page will be opened in an embedded web view, so although managed on a different server, the user sees it as a native part of the application. The code on this web page will receive information to identify the user and verify their identity, so we can be sure this is who he claims to be. And then that web page can display the required information – for instance, provide the list of available promotional offers, ask to invite a friend via his/her email and anything else we would like it to do.
The user picks the offer and clicks “Confirm” or provides additional info (e.g. the credit card info to make the purchase) – and when the workflow is done, the web page is closed and the user returns back to the application. So you can implement some brand new functionality and display it to the app users without them having to update the app version. Moreover it is done dynamically – so you can start with offering a promotion only to select a pilot batch of customers, and once you are satisfied you can roll it out to all customer base.
You can read more details about how the user authentication information is passed to the external web page and see an example code of such web page on our documentation page – I will post the link in the description.
Custom pages
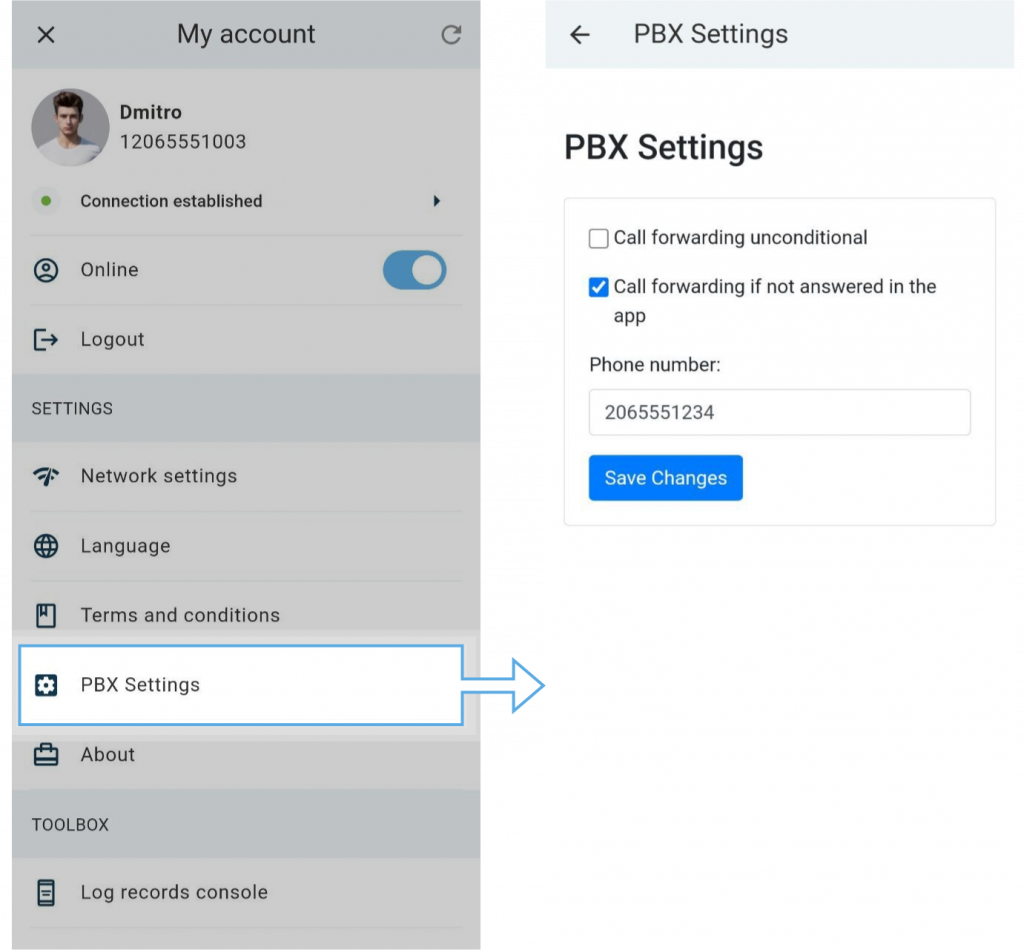
This is required when you want to display to the user in the app certain information, for example, the current configuration of call forwarding settings on the PBX side, and potentially allow the user to make changes, e.g. add a new forwarding number. Similar to call-to-action pages, these are going to be maintained on a separate server, so they can be easily changed and adjusted by a different team and will not require re-uploading of the application to the App Store when changes are made. Similar to how the app communicates with call-to-action pages, information to authenticate the user will be passed, so an external webpage can securely verify the user’s identity.
During the configuration of the application layout (when you define the application name and UI parameters such as the color scheme) you can define where you want to show an item to invoke such custom page.
An extra menu item in the “Settings” menu – “PBX settings” is a good fit for this:
A new icon (for instance “Promo offers”) to be added to the application menu, shown at the bottom of the screen, together with buttons such as Contacts or Call log.
Why Choose WebTrit?
WebTrit isn’t just about providing a white-label softphone—it’s about giving you the freedom to shape it to fit your business and your customers. Whether you want to deliver a seamless sign-up experience, promote new offers directly within the app, or empower users with easy access to advanced settings, WebTrit has you covered.
It’s your app, your brand, and your way of connecting with your customers—on your terms. And best of all, you don’t need to be a tech wizard to make it happen. Our intuitive tools and robust API integrations make even complex customizations feel simple and to be maintained by your local team using the tech stack and programming languages they are familiar with.
Are you ready to see how WebTrit can help you build a more powerful connection with your customers? Contact us to give a bit more details about your project and goals, so we can suggest the best approach!


